Intro
Microgreens are the tiny, yet mighty, superheroes of the plant world, packing a nutritional punch that belies their diminutive size. These young vegetable greens have gained immense popularity among health enthusiasts and indoor gardeners alike, thanks to their ease of cultivation and the minimal space required.
If you’re intrigued by the idea of adding a pop of color, texture, and nutrients to your meals with home-grown microgreens, you’re in the right place. In this blog post, we’ll guide you through how to grow microgreens in the comfort of your home in just 5 simple steps. Whether you have a green thumb or are new to indoor gardening, these tiny plants are remarkably forgiving and rewarding to grow.
Choosing Your Microgreen Seeds

Selecting the right seeds is your first and most exciting step toward embarking on your microgreen growing journey. The beauty of microgreens lies in the vast array of seeds available for cultivation.
From the peppery zing of arugula to the subtle sweetness of basil, your options are nearly limitless. Favorites among microgreen enthusiasts often include radish, kale, mustard greens, and even beet seeds for their vibrant colors and flavors. These varieties not only promise a delectable taste experience but are also known for their quick germination and hassle-free growth.
When it comes to purchasing seeds, prioritizing quality is key. Opt for seeds that are specifically designated for microgreen cultivation or those labeled as organic.
This ensures that your greens will be free from any unwanted chemicals, providing you with the purest and healthiest harvest possible. Organic seeds not only support sustainable farming practices but also contribute to the overall well-being of your indoor garden.
Another important consideration is the quantity of seeds you’ll need. Given that microgreens are grown densely to achieve a rich, full harvest, buying in bulk can be a wise decision. Not only does this ensure you have a sufficient supply for continuous planting, but it can also be more cost-effective in the long run.
In your quest for the perfect seeds, don’t shy away from experimenting with different types. Mixing and matching varieties can yield a beautiful and flavorful array of greens, turning each harvest into a delightful surprise. Whether you’re drawn to the idea of spicy mustards or the classic taste of kale, the choice of seeds sets the foundation for your microgreen gardening adventure. So, delve into the exciting world of seeds and let your culinary and gardening imagination guide you.
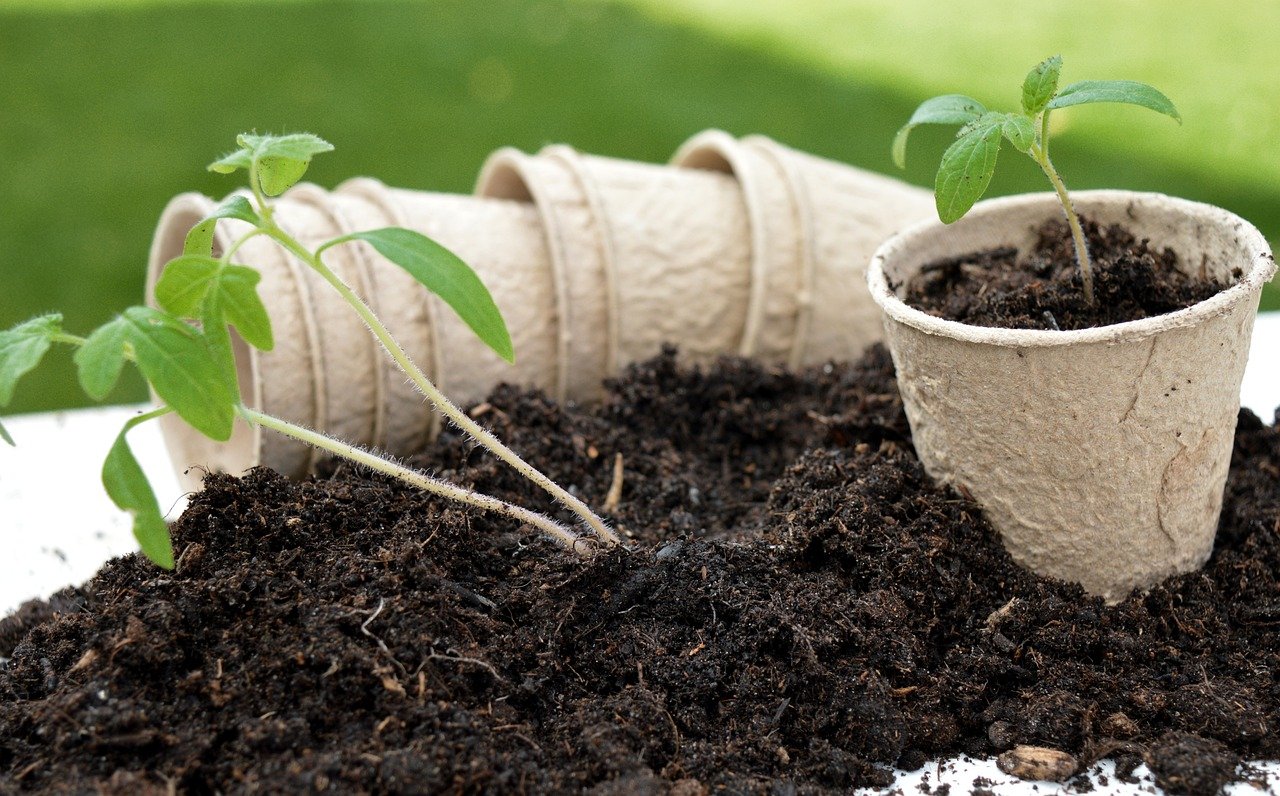
Preparing Your Growing Tray

For your microgreen venture to flourish, setting up an optimal growing environment is crucial, and it all begins with selecting the right container. A standard 10×20 inch growing tray is commonly recommended for its size and convenience, but feel free to use any shallow container that suits your space. It’s essential that whatever container you choose, it should be pristine and equipped with drainage holes to avert the risk of water accumulation, which could harm your delicate seedlings.
Your next step involves choosing a suitable growing medium. While traditional soil can be used, many indoor gardeners opt for a soilless potting mix, coconut coir, or hemp mats due to their cleanliness and ease of use. These mediums are particularly favorable for indoor settings as they minimize mess and reduce the risk of soil-borne diseases affecting your microgreens.
Distribute your chosen medium evenly across the tray to a depth of approximately one inch. This shallow depth ensures that your microgreens have just enough substrate to root in without wasting material.
Once your tray is filled, the medium requires pre-moistening. This step is pivotal as it prepares a welcoming bed for the seeds to nestle into and begin their germination process.
Using a spray bottle, gently mist the surface of the medium to achieve a damp, but not soggy, condition. The goal is to create a uniformly moist environment that encourages seed germination without water-logging, which could lead to mold or fungal issues. This delicate balance of moisture is key to kickstarting your microgreens’ journey to growth.
With your growing tray properly prepared, it’s primed to become the nursery for your soon-to-sprout microgreens. This setup, marked by cleanliness, adequate drainage, and the perfect moisture level, lays the foundational stone for a successful indoor gardening endeavor.
Sowing the Seeds

The adventure truly begins once your setup is ready, transitioning from preparation to action with the sowing of your seeds. Carefully sprinkle the seeds over the surface of your moistened growing medium.
Aim for an even distribution, as this ensures each microgreen has enough space to thrive while still creating the dense mat of greens characteristic of successful harvests. There’s no need to dig trenches or bury your seeds; they do best right at the surface where they can access light immediately upon sprouting.
After distributing the seeds, a light press can be beneficial. This doesn’t mean compacting the soil, but rather ensuring that each seed makes good contact with the medium beneath it. You can achieve this by lightly patting the surface with your hand or a flat object like a small board. Some varieties of microgreens may benefit from a very thin covering of additional growing medium, but this varies and is often not necessary. If you choose to add this layer, ensure it’s just a dusting to avoid impeding the sprouts as they reach for the light.
Following the sowing, a crucial step is to ensure the seeds remain moist but not waterlogged. A fine mist from a spray bottle works well for this, providing the necessary moisture without disturbing the newly sown seeds. To create an ideal germination environment, cover your tray with a lid or another tray. This retains moisture and warmth, both key factors in encouraging germination.
It’s this careful balance of moisture, warmth, and gentle handling that sets the stage for successful microgreen growth. By closely monitoring and adjusting these conditions as needed, you’re not just sowing seeds, but nurturing the beginnings of a lush, green harvest.
Watering and Caring for Your Microgreens

After your seeds have been sown, the next crucial phase is ensuring they receive the appropriate amount of water and care to transform into lush microgreens. Begin this journey by lightly misting your seeds, then covering the tray to establish a dark, moist haven that encourages germination. It’s important to check on your seeds daily, providing a gentle mist to maintain the moisture level of the medium without causing it to become waterlogged.
As soon as you notice the sprouts breaking through the soil, usually within 2-3 days, it’s time to remove the cover. This marks a pivotal shift in their care, as they now require light to continue their growth.
Positioning your tray in a spot that receives ample sunlight, such as a south-facing window, can suffice. However, for those seeking more consistent results or lacking in natural light, investing in grow lights is a wise choice. Placing these lights a few inches above your microgreens ensures they receive the intensity of light they need without overheating or drying out.
Maintaining an even moisture level is key throughout the growth cycle of your microgreens. A light, daily watering or misting helps achieve this balance, promoting steady growth without the risk of overwatering.
It’s essential to water gently to avoid disturbing the delicate roots or dislodging the seeds. As your microgreens mature, keeping an eye on the moisture content of the growing medium and adjusting your watering routine as necessary will help you avoid common issues like mold or fungal growth.
By providing consistent care, ensuring adequate light, and maintaining the right moisture level, you’ll create an optimal environment for your microgreens to thrive. This attentive approach not only supports their development but also paves the way for a bountiful and nutritious harvest.
Harvesting Your Microgreens

The culmination of your microgreen cultivation journey arrives swiftly, often within just 7 to 14 days after the seeds are sown. The right time for harvesting is signaled by the emergence of the first true leaves, distinct from the initial, simpler seed leaves. This stage indicates your microgreens are at their peak in both flavor and nutritional value.
To harvest, you’ll need a pair of clean, sharp scissors. Gently clip the stems of the microgreens close to the soil’s surface. Take care to cut evenly and avoid pulling at the roots, as this can dislodge the growing medium and make subsequent clean-up more challenging.
Once harvested, it’s essential to rinse your microgreens lightly in cool water. This step helps remove any residual growing medium or debris clinging to the delicate leaves and stems. After rinsing, allow them to air dry on a clean cloth or paper towel, or use a salad spinner to gently remove excess water.
Microgreens bring a burst of flavor and color to a variety of dishes. They can be incorporated into salads for added texture, used as a garnish on soups and sandwiches for a fresh twist, or blended into smoothies for a nutrient boost. The possibilities are limited only by your culinary creativity.
It’s important to remember that microgreens, with their tender structure and high moisture content, are best enjoyed soon after harvesting. While they can be stored briefly in the refrigerator, ideally in a container that allows for some air circulation, they should be consumed within a few days to savor their freshness and nutritional benefits fully.
By mastering the art of growing and harvesting microgreens, you not only enrich your diet with superfoods but also gain the satisfaction of nurturing plants from seed to table. Enjoy the harvest and the journey of growing these vibrant, nutritious greens.