

Intro
Indoor gardening, particularly starting seeds indoors, is a fantastic way to get a head start on your garden before the arrival of the warmer season. It allows gardeners to control the growth environment better and provides more growth time for the plants. However, the indoor seed-starting process can be intimidating, especially for beginners. This blog post aims to guide you through this process, highlighting everything from timing, choosing pots and soils, setting up lighting, to finally transplanting your seedlings outdoors.
Timing: When to Start Seeds Indoors for Transplanting Outside
Deciding when to commence the indoor seed starting process is a vital step that requires strategic planning. The objective is to have your seedlings robust and mature enough to endure the transition to outdoor life. The most suitable time to begin is largely contingent on the type of plant you intend to grow, and it’s usually advised to start seeds 6-8 weeks prior to the anticipated last frost in your region. For example, if your area typically experiences the last frost around mid-April, your seed starting process should kick off in late February or early March. That being said, some plants that thrive in warmer seasons like tomatoes and peppers may require a bit more indoor nurturing, up to 8-10 weeks before making the move outdoors. To avoid guesswork, always refer to the guidelines provided on the seed packet, which usually provide specific planting timelines. Remember, starting seeds indoors is all about giving your plants a beneficial head start, and timing is key in this process.
Selecting Suitable Pots for Indoor Seed Starting
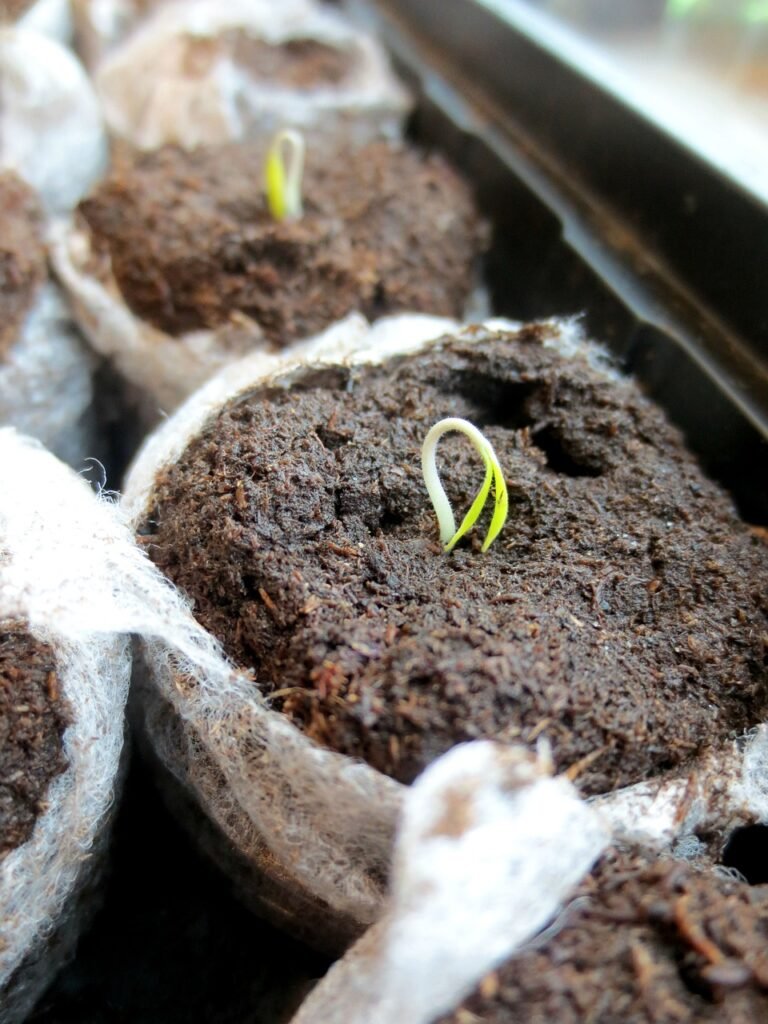
When embarking on your indoor seed starting journey, selecting the right containers is a critical first step. Your pots should ideally be small, typically around 2-3 inches in diameter, to suit the initial growth stages of your seedlings. This is large enough for the seed to sprout and develop a decent root system but small enough to keep the soil from drying out too quickly.
Biodegradable pots made from peat, coir, or cow manure are excellent choices for several reasons. Not only are they eco-friendly, but they can also be directly transplanted into your outdoor garden when the time comes, minimizing root disruption. It’s a simple yet effective way to help your young plants transition smoothly from indoors to outdoors.
If you choose to go the plastic pot route, make sure they are equipped with ample drainage holes. These holes allow excess water to escape, preventing the roots from sitting in overly saturated conditions which could lead to root rot or stunted growth. No matter what type of container you opt for, proper drainage is a crucial aspect that should not be overlooked.
Seed trays are another favorite among gardeners for starting seeds indoors. These trays are essentially larger containers divided into multiple individual cells, allowing you to sow a multitude of seeds all in one convenient location. Seed trays are especially useful if you’re looking to start a big batch of seeds without taking up too much space.
Ultimately, your choice of pots for indoor seed starting will largely depend on your personal preference, the number of seeds you plan to sow, and your available space. Whichever option you choose, remember that a good pot coupled with the right care can greatly influence the successful germination and growth of your seeds. Follow the link here to find Great starter pots and trays.
Choosing the Right Starting Soil for Your Seeds

Selecting an appropriate seed starting mix is a pivotal factor in the successful germination and growth of your seeds. It’s not advisable to use soil straight from your garden, as it may harbor disease-causing pathogens and might not contain the essential nutrients required for optimal seed germination. Instead, a well-drained, fine-textured, and organically-rich starting soil is a more fitting choice.
Commercially prepared seed starting mixes are widely available and are specifically formulated to provide an optimal environment for seed germination. They typically consist of a blend of peat moss, vermiculite, and perlite, providing excellent moisture retention, drainage, and aeration. The fine texture of these mixes makes it easy for tiny seedling roots to penetrate, allowing them to access water and nutrients more readily. Here are some options for Seed starting mix.
However, if you are feeling adventurous and would like to prepare your own mix, a simple recipe involves blending equal quantities of peat moss, vermiculite, and perlite. Peat moss aids in moisture retention, vermiculite improves aeration and water-holding capacity, while perlite enhances drainage and prevents compaction. The resulting mix will be well-aerated, lightweight, and hold moisture effectively, providing an ideal environment for your seeds to germinate and grow.
Regardless of whether you choose a store-bought mix or make your own, it’s essential to keep the starting soil consistently moist, but not waterlogged. Saturated conditions can result in poor aeration, potentially leading to root diseases and inhibiting seed germination and growth. A good rule of thumb is to water until the mix is as damp as a wrung-out sponge, and not more.
While the choice of pots and timing are important in starting seeds indoors, the right starting soil can significantly influence the success of your seed germination. It provides a nurturing environment for your seeds to sprout, helping to ensure that your indoor gardening endeavors are rewarding and successful.
The Importance of Proper Lighting for Indoor Seed Starting

Light plays a pivotal role in the healthy growth and development of your seedlings. It influences everything from germination to leaf and stem development. Therefore, when starting seeds indoors, ensuring they receive an ample amount of light is paramount.
While it’s tempting to rely on sunlight from a nearby window, this source may not provide the consistency and intensity required for optimal growth, particularly during the late winter or early spring months. This is where an indoor grow light can be a game-changer, supplying a steady, reliable source of light that can help foster strong, healthy seedlings.
Fluorescent lights are a widely favored option among indoor gardeners. These lights are not only affordable but also efficient, making them an ideal choice for starting seeds indoors. Fluorescent bulbs produce a great deal of light without generating too much heat, making them safe to use around your seedlings without the risk of scorching them.
When setting up your indoor grow lights, it’s crucial to position them correctly. The lights should be situated just a few inches above the tops of your seedlings. This close proximity helps maximize the amount of light absorbed by your plants while mimicking the intensity of natural sunlight. As your plants grow taller, it’s necessary to gradually elevate the lights to maintain this optimal distance.
There’s no one-size-fits-all approach when it comes to the duration of light exposure. However, most seedlings benefit from 14 to 16 hours of light per day, followed by a period of darkness. This cycle encourages a healthy growth pattern that mirrors the natural day-night rhythm.
Don’t forget, though, that plants also need periods of darkness to undergo essential metabolic processes. Hence, giving your plants a break from the lights for about 8 to 10 hours per day is just as important as providing ample light.
Overall, an indoor grow light can be a worthwhile investment for starting seeds indoors. While sunlight is the most natural source of light for plants, the consistency and control provided by indoor Grow Lights can offer a significant advantage in fostering vigorous, healthy seedlings, setting the stage for a successful transplanting process down the line.
The Process of Transplanting Your Seedlings Outside

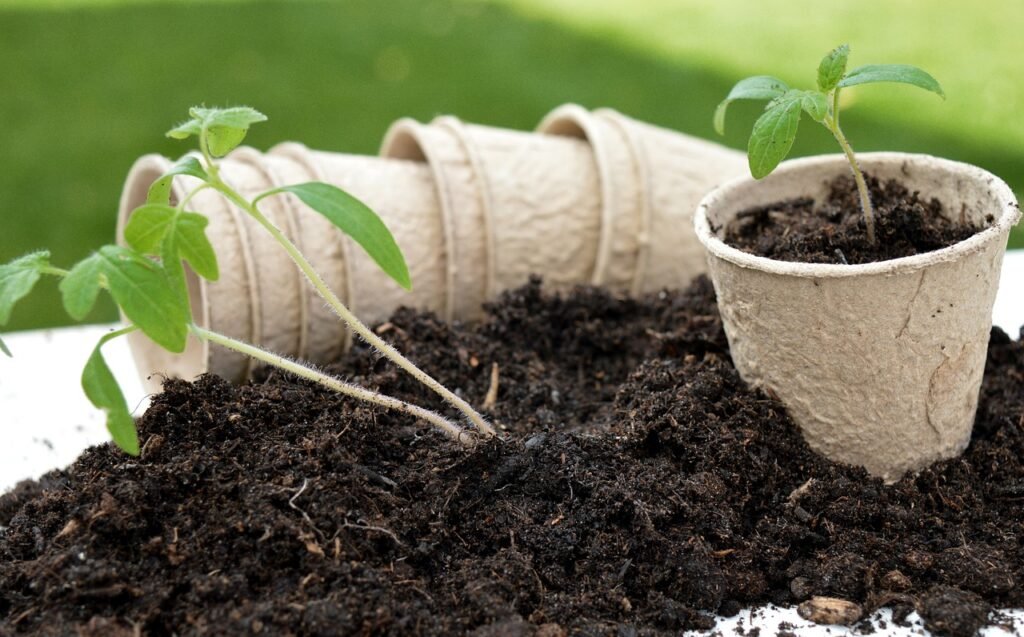
Once your seedlings have matured over a few weeks, the time arrives to move them into your outdoor garden. A crucial preparatory step in this process is to acclimate your seedlings to the outdoors, a process commonly referred to as ‘hardening off’. This step equips your young plants to adapt to fluctuating outdoor weather and conditions.
Hardening off takes place over approximately one to two weeks. You start by setting your seedlings outdoors in a sheltered, shady area for a few hours each day, progressively lengthening their time outside and gradually introducing them to more sunlight. This slow introduction prepares the seedlings for the harsher outdoor environment, minimizing the shock of sudden temperature, light, and wind changes.
Once your seedlings have been adequately hardened off, it’s time to transplant them into your garden. It’s best to carry out the transplanting on an overcast day or in the late afternoon to prevent the hot sun from stressing the newly transplanted seedlings. Dig a hole that’s sufficiently deep to accommodate the seedling’s roots. Place the seedling in the hole and gently fill the remaining space with garden soil, firming it around the base of the plant.
The final step in the transplanting process is to water your transplanted seedlings well. This helps the soil settle around the roots and provides your young plants with the hydration they need to recover from the shock of transplanting. Continue to monitor your seedlings and water regularly to help them establish in their new outdoor home.
In conclusion, transplanting your indoor-grown seedlings outdoors is a process that requires care, patience, and the right timing. By adequately preparing your seedlings and following the correct steps, you’re setting the stage for your home-grown plants to thrive in their outdoor garden. Rest assured, the fruits of your indoor seed starting labor will be well worth the effort when you see your healthy, vibrant plants flourishing outside.

One thought on “Get a Jumpstart on the season: Starting Seeds Indoors”